Players who like drones, RC cars, RC boat, and riding electric bicycles, scooter and electric skateboards always lament the battery consumption is too fast, battery life is short, charging is slow and so on. The price of battery packs on Amazon is also very different, and it is not possible to screen for good and cheap battery packs. Some may really want to buy the best materials to DIY a reliable battery pack.

And the cost of DIY battery packs is only one-third of the finished product, which really saves money. Today I will teach you how to DIY a safe and reliable battery pack with low cost.
Topic includes:
I. Required Materials
II. Required Tools
III. DIY process
Let ’s take a DIY 4S battery as an example (4S 5000mAh 35C)
I.Required materials
- Battery cell
The difference in the internal resistance of cells determines the battery capacity and life. The key point of the performance of self-assembled battery pack is that the internal resistance of multiple cells should be similar. If the internal resistance of each cells differs too much, the capacity of the assembled battery and life expectancy is greatly reduced. However, measuring the internal resistance requires professional equipment, and you need to buy multiple batteries to measure and then pair them. We cannot buy so many batteries for measurement.
We can only rely on the cell sellers to supply high quality of group of cells. (why so ,you can refer to article to get some suggestions )After the battery is bought back, we can simply measure the pairing situation:
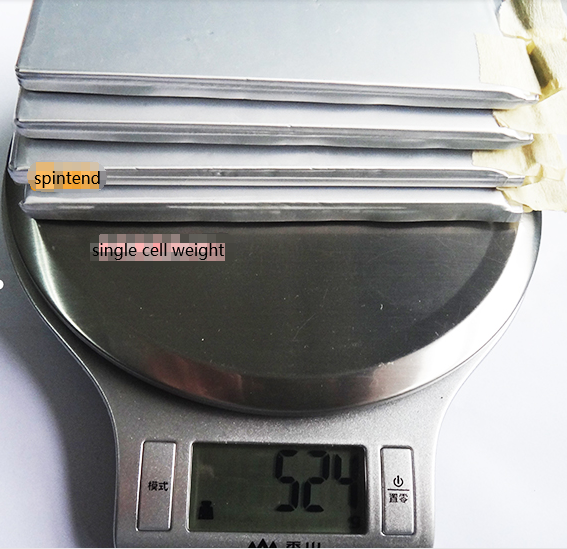
(1) Weighing: Weigh the cells one by one. The weight of each cell should be within a few grams. If there is a large difference in cell weight, it is estimated that there is a problem.
(2) Measuring voltage: The cells are fully charged one by one, and the voltage when each cell is fully charged should be within 0.03V. Cells that differ too much cannot be used.
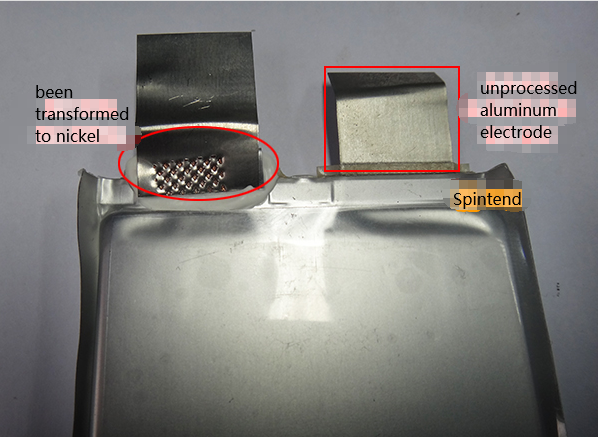
The positive electrode of the purchased cell must have been transferred to nickel, because the normal cells pole ears are made of aluminum and cannot be soldered. And those who have transferred to nickel can easily solder ordinary solder. The single-chip 5000mAh 35C cell we selected this time weighs 131g and measures 145 * 49 * 8mm.
- Balance cable
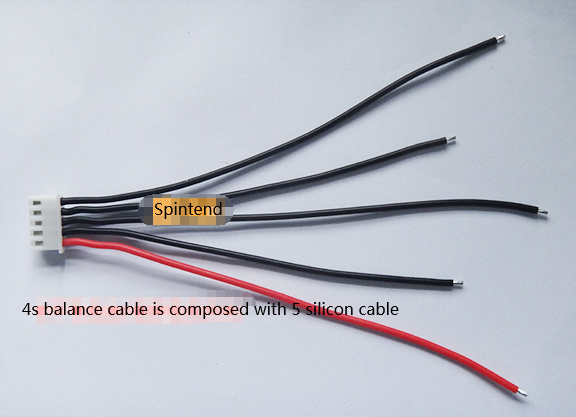
Each set of balance wires needs a black wire with a total number of cells and a red wire. For example, 4S is composed of 4 black wires and a red wire. Whether the balance charging and discharging function can be successfully achieved depends on it.
- Power cord
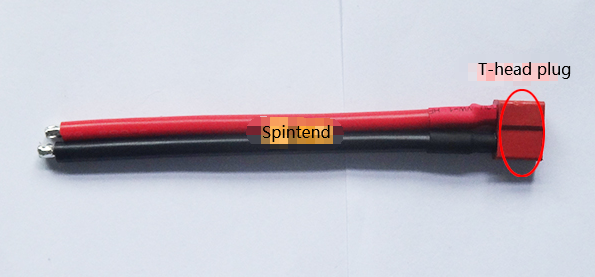
For the main channel for current input and output, the power cord with silicone sheath should be selected. Generally, 12AWG or 14AWG specifications are used. Because our multi-axis body is equipped with a T plug, for convenience, we choose a 12AWG power cable that has been soldered with a T head bus. Of course, you can choose the corresponding plug according to your actual situation, such as XT60, XT150 and so on.
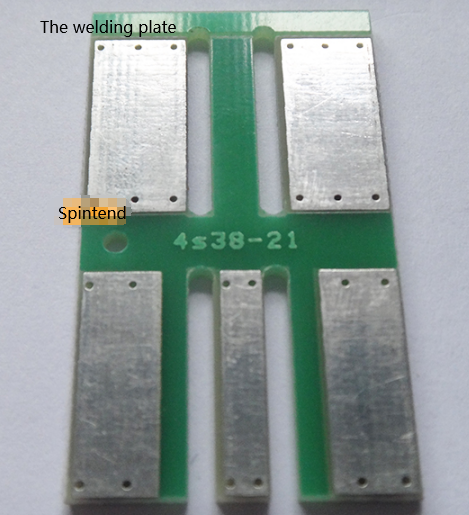
- Electric core welding plate
This is an important artifact of DIY battery pack, greatly increasing the safety and simplicity of the DIY process. There are many options for the cell welding plate, according to cell numbers. We DIY 4S batteries this time, so the choice is the 4S cell welding plate. Its structure is very obvious, you only need to arrange them in sequence according to the cell series rules.
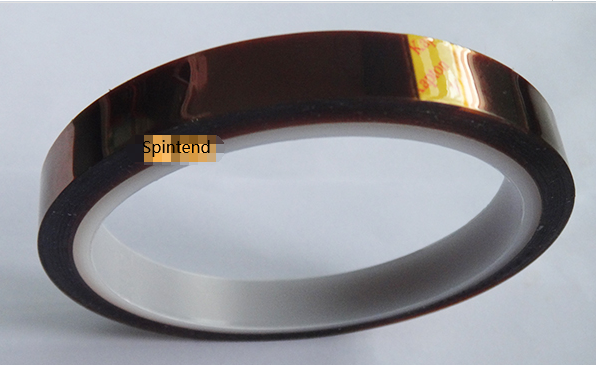
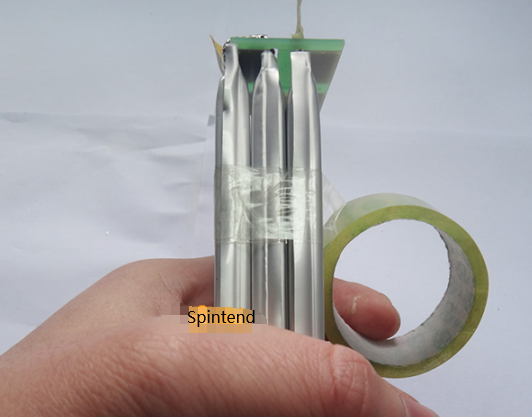
- High temperature tape
The use of high-temperature adhesive tape is also indispensable, because the instantaneous current of the model lithium battery is very large, and it is easy to get hot under the condition of full discharge, especially at the welding point, and the high-temperature adhesive tape has high insulation and high temperature resistance. It’s one of the essential battery components. We use 12mm wide high temperature tape.
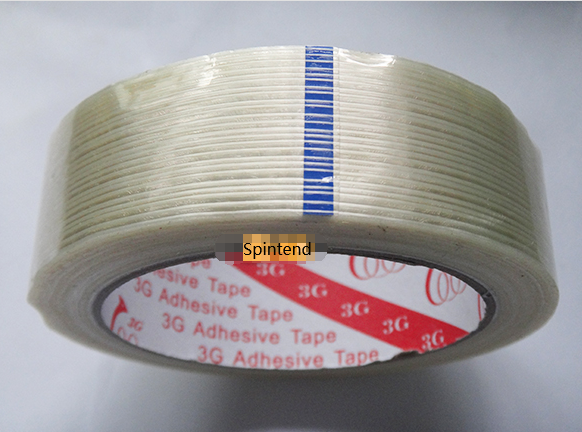
- Fiberglass tape
The function of glass fiber tape is to wrap and protect the welded circuit and the position of the solder joint again, greatly increasing the safety. According to the size of the selected cell, we chose a roll of 30mm wide glass fiber, of course, the actual operation only needs a short section.
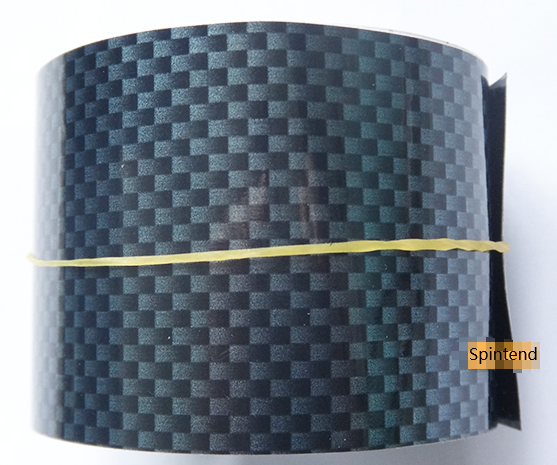
- Carbon fiber tape
Carbon fiber tape also protects the battery. When using, wrap the front of the battery around to avoid damaging the battery core when lightly rubbed. The snake-skin of the finished ACE battery is carbon fiber tape. The width of the carbon fiber tape should be similar to the width of the battery cell, and the length is about 2.5 times the length of the battery cell. The width of the cell we used is 49mm and the length is 145mm, so this time I bought a carbon fiber tape with a length of 1 meter and a width of 48mm.
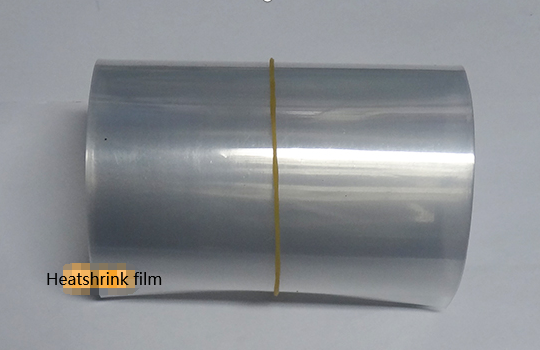
- Heat shrinkable film
The heat-shrinkable film is used to wrap and fix the battery after the battery is fully assembled, forming a whole that is not easy to deform. We chose a heat-shrinkable film made of transparent PVC. The width of the heat-shrinkable film should be selected according to the size of the cell. The calculation formula is: cell height * cell number + cell width. For example, this time the cell size is 145 * 49 * 8mm, and the required width of the heat shrinkable sleeve is: 8 * 4 + 49 = 81mm. The width of the heat-shrinkable film must be greater than 81mm. In view of the shrinkage characteristics of the heat-shrinkable film, there must be some room for selection. we chose a 90mm wide heat shrinkable film this time.
- Ordinary transparent glue
Ordinary transparent glue only needs to bind and fix.
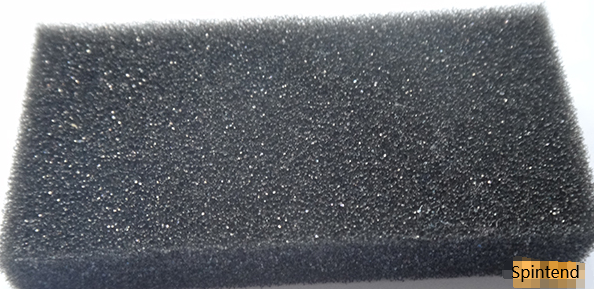
- Sponge
The sponge is used for filling and protection. Before filling, there must be a high-temperature adhesive tape.
II . Required tools
- Electric soldering iron, soldering tin
Electric soldering iron is the most critical tool, the power must be large, at least greater than 60W, preferably more than 80W. The soldering area of the cell pole ear is big, and the heat dissipation is quick and easy to cool down during welding, but if soldering last for a long time, the battery cell will be damaged due to heat. Choose a solder tin with a thicker diameter and a rosin flux in the center
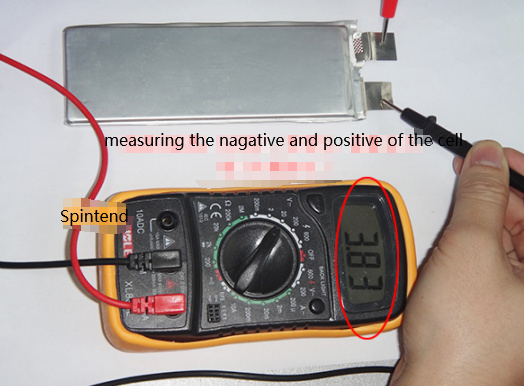
- Multi-meter
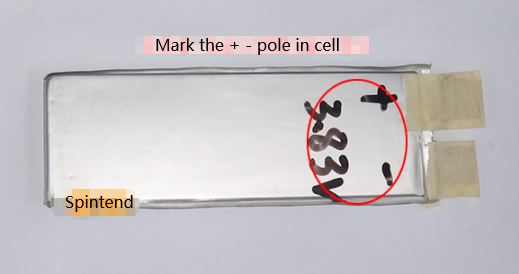
A multi-meter is used to measure the positive and negative poles and voltage of the cell. Generally speaking, the electrode that has been turned to nickel is the positive electrode, but it cannot be determined 100%, which is subject to measurement. The positive and negative poles of the battery cell must be confirmed, otherwise it may cause irreparable errors.
- BB sounds
The function of the BB ring is to measure whether the battery cell is normal after connecting the balance line, whether the reading cannot be displayed due to overheating or poor contact. If either of this happens, only the bad battery can be removed.
III . Assembly process
First, processing the battery cells
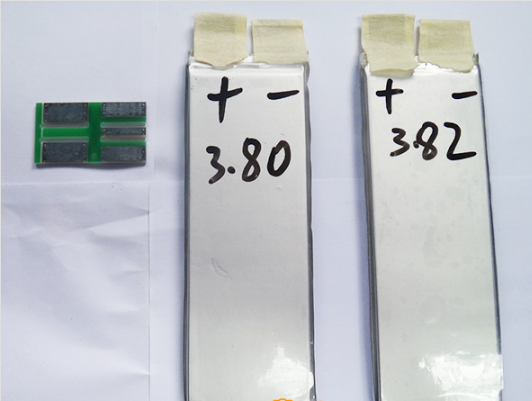
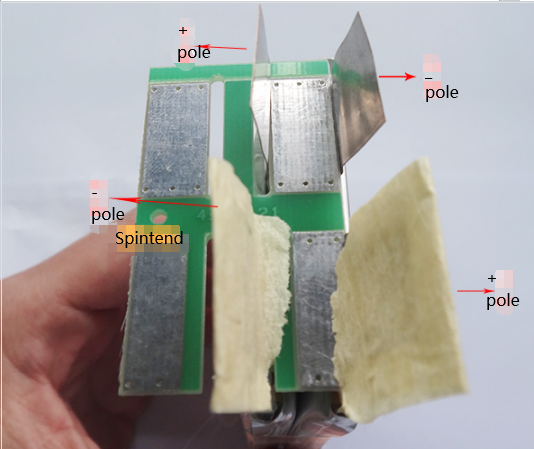
1.Take out a multimeter to test the positive and negative electrodes and voltage of the cell one by one and mark it on the cell with a pen. Although in general, the electrode ears that have been converted to nickel are positive, and the electrode ears that are not converted to nickel are negative With a multimeter test, there must be no fluke.
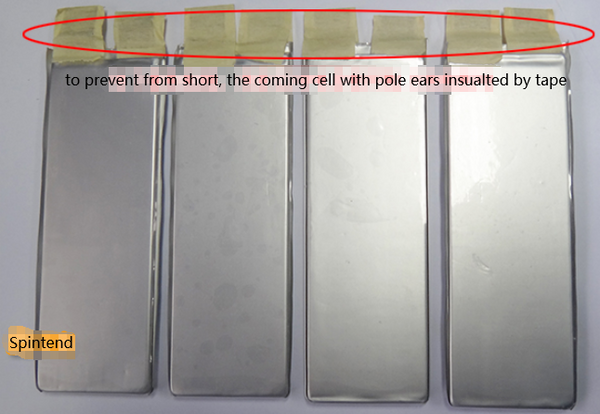
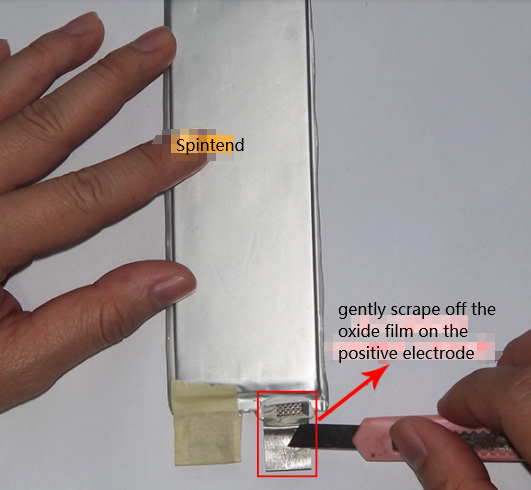
Then, for safety, wrap the negative pole ears with tape to avoid accidentally causing a short circuit.
For better soldering, use a knife to gently scrape off the oxide film on the positive electrode of the nickel cell, and then wrap it with tape ears.
Secondly, Welding cell plate
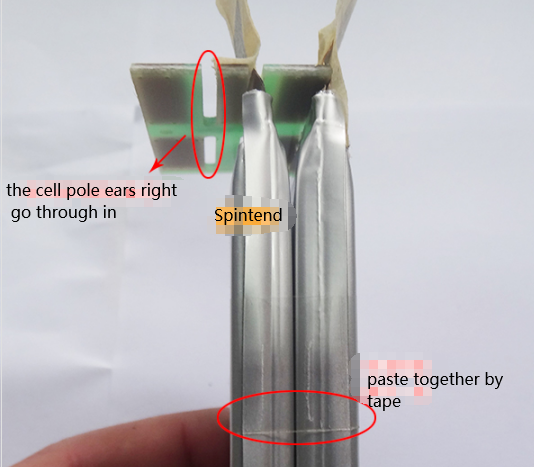
(1)Take out the 4S battery welding board. There are four slots on the small board. Take two cells and arrange them in series on the small board. The two cells are fixed with transparent glue and then welded in series.
The following figure shows the connection circuit of 4S in series.
Add more tin when soldering, because the power cord is still soldered on it
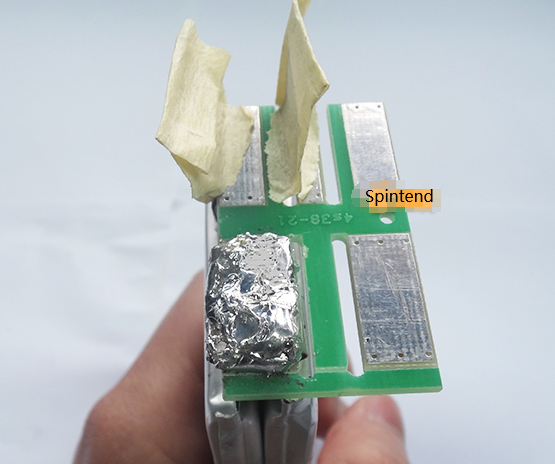
(2) Welding should come piece by piece. In order to avoid short circuit, only remove the insulating tape on the pole earwhen welding the corresponding pole ear. Welding the third cell also needs to be fixed with transparent glue before continuing.
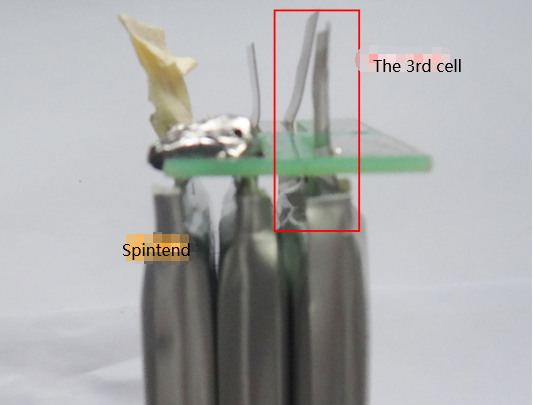
Weld the fourth cell according to the above method
During soldering, the soldering iron will contact the ears for a long time, and the battery will be overheated and the heat will obviously rise. Therefore, it is not necessary to be full into a ball state for the soldering point, as long as there is no virtual soldering and breakage.

If there are obvious sharp points on the surface of the solder joint, repair it with a file, or flatten it with an electric soldering iron.
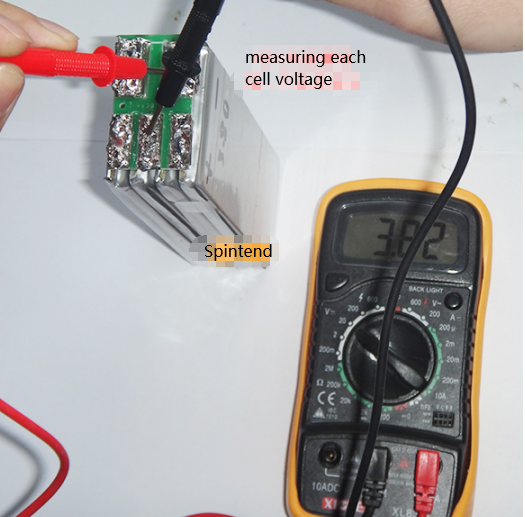
Then use a multi-meter, mainly to measure whether the voltage of each cell is normal. If the voltage difference is very large or 0, the battery is overheated or damaged during welding, or there is a problem of virtual welding and poor contact. Further inspection is required. If it is damaged, it must be taken out and replaced.
Thirdly, Welding power cable and balance cable
Deal with the power cord, the last section of heat shrinkable tube
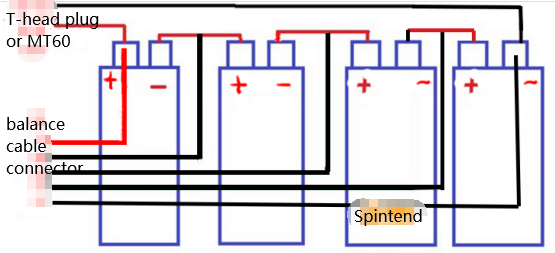
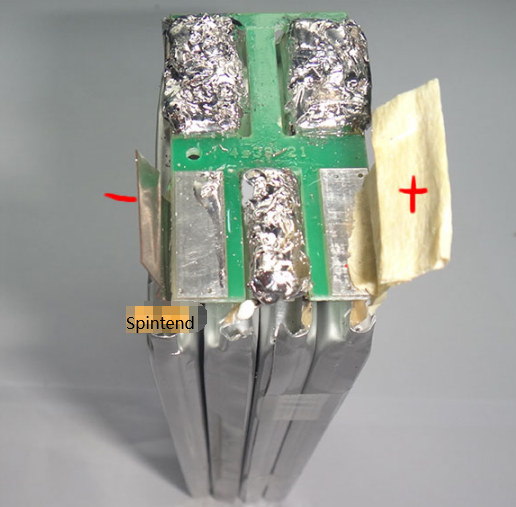
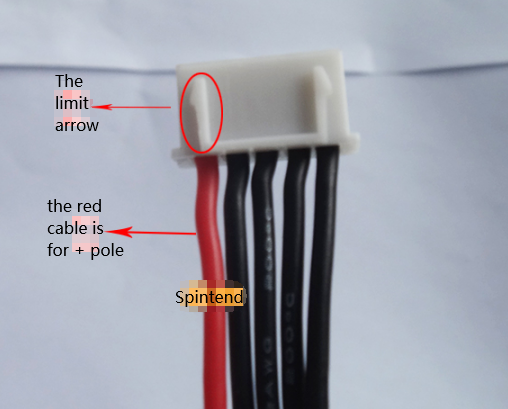
Before welding the power cord and the balance cable, it is necessary to understand the layout of the corresponding charger interface to avoid short circuit during charging. Corresponding to the B6 charger, as shown in the figure below, the limit arrow is upward, and the positive red balance line must be on the far left.
![]()
When soldering the power cord, the solder joints must be full, add a little more tin, check it, and make sure that there is no virtual soldering. Then is the welding power cable (12AWG T head bus), according to the marked positive and negative electrodes on the corresponding color welding cable, red is the positive electrode, black is the negative electrode. Only the positive and negative welding points are needed to weld the power cord, and the remaining welding points are wrapped with insulating tape to avoid short circuit.
The next step is to solder the balance cable, the red is connected to the positive pole of the power supply, and the black is linked in sequence, according to the link diagram.

Before welding the balance cable, check the cable order. When the limit arrow is up,make sure the red positive electrode on the left. If not, it is wrong, and it will be short-circuited when using the balanced charge.
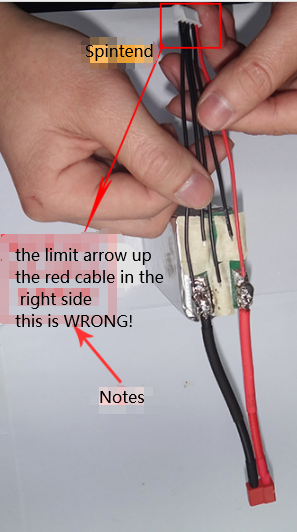
Note that if the above situation occurs, there are two ways to solve it:
One is to remove the power cord that has been welded and re-arrange the welding. When the positive and negative poles are marked, first put the limit arrow of the plug of the balance cable up, and the red wire is connected to the positive pole and arranged at the leftmost end, and the power cord is arranged. Remember that red must be connected to the positive electrode.
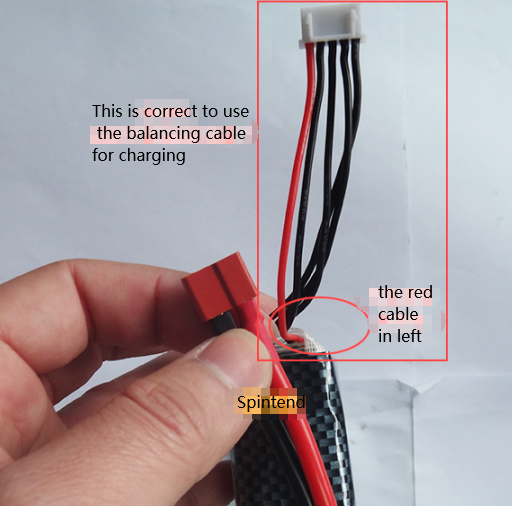
The other is to pull out the wire at the plug end of the balance cable, and then arrange it, as shown below.
After soldering, be sure to check whether there is a virtual soldering situation, and gently pull the soldered wire to see if there is a drop, abnormal position, or looseness.
After welding the balance cord, use the BB sound test. Test whether each cell is normal.
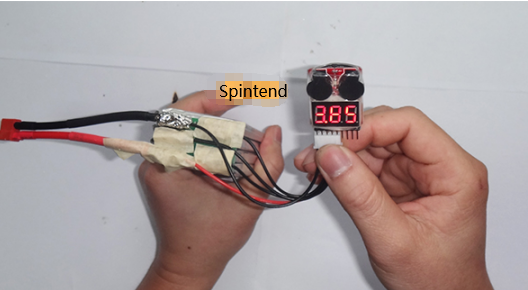
If the display is similar to the one you used to test with a multimeter, you can move on. The reading displayed by the BB ring is inaccurate, and everything is based on the multimeter reading.
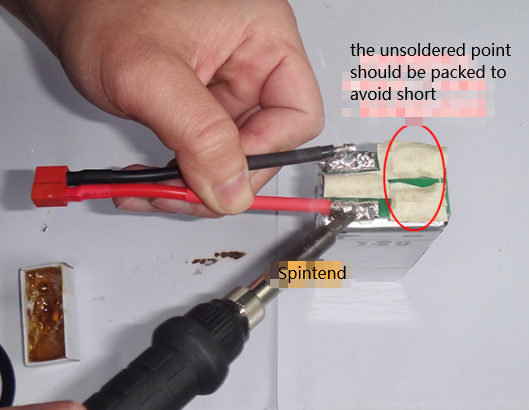
Fourth, paste high temperature tape
High temperature adhesive is highly insulating, so each solder joint must be pasted independently.
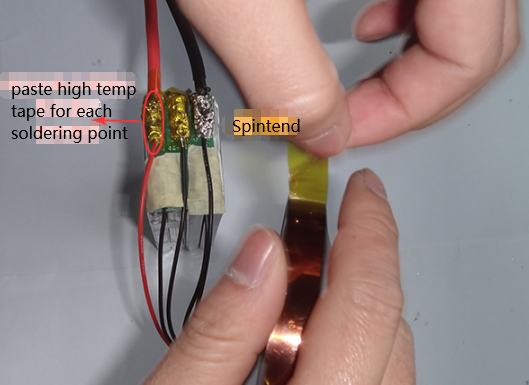
Then, let's paste the cross section once. When pasting, the gap between the solder joints should be compressed with a non-conductive object, so as to achieve the role of filling and insulation.

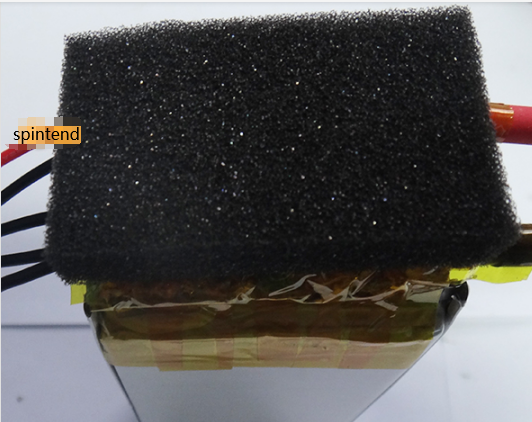
Fifth , Place the sponge
Place the prepared sponge and fill the groove between the power cords. There are two purposes, one is to fill, and the other is to protect the battery from short circuit caused by impact deformation.
Sixth, Winding glass fiber tape
First wrap the sponge with fiberglass skin
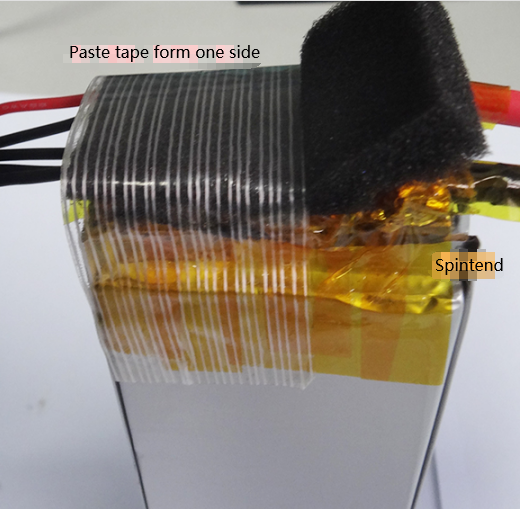
Next, wind the fiberglass horizontally and wrap the power cord and balance cord.
Seventh, Carbon fiber sleeve
Then use carbon fiber, cover it up and down, adjust the position, be sure to protect the power cord and balance cable to avoid damage during use. The carbon fiber cover is selected to be the same size as the battery core. First of all, measure how long the upper and lower packages need to be. Cut and wrap the package so that the fiber sleeve can be easily adjusted to achieve the best effect of the paste. It needs to be 350mm long.
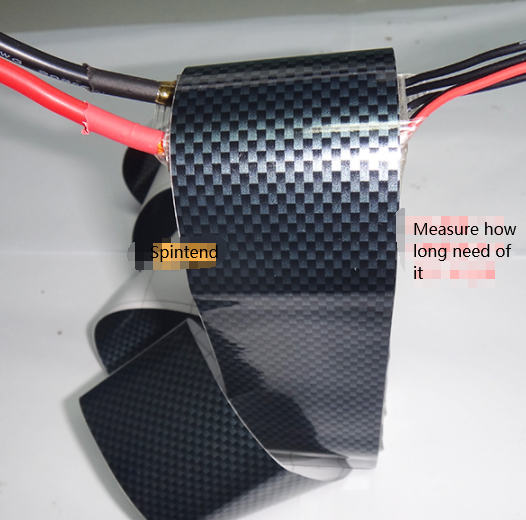
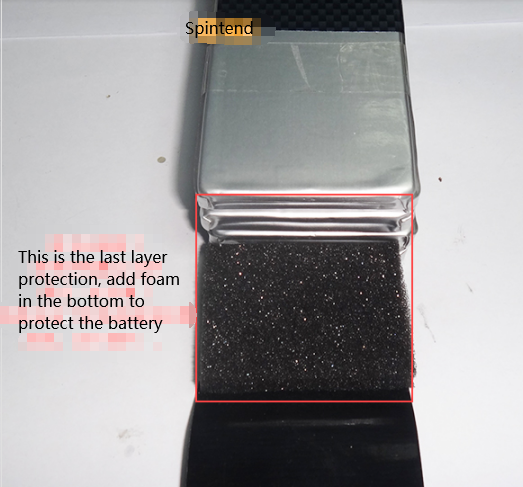
When pasting, you should start from the middle and put a sponge in the bottom of the battery to protect the bottom.
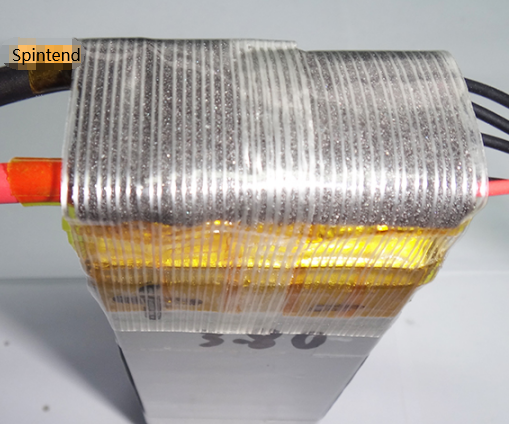
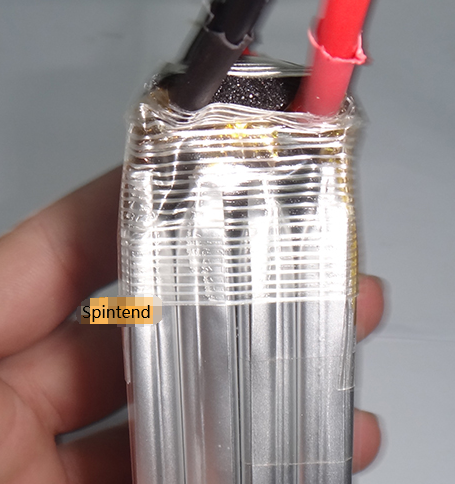
Finally wrapped, and heat shrink film
Finally, put on the PVC heat shrinkable film, wrap the outer body of the fast battery first, adjust the position, and then use a heat gun to shrink the heat shrinkable tube to an ideal state.
The heat-shrinkable film shrinks when heated, and it is best to use a hot air gun to heat it, because it is easy to burn through or shrink and wrinkle when heated with an open flame.

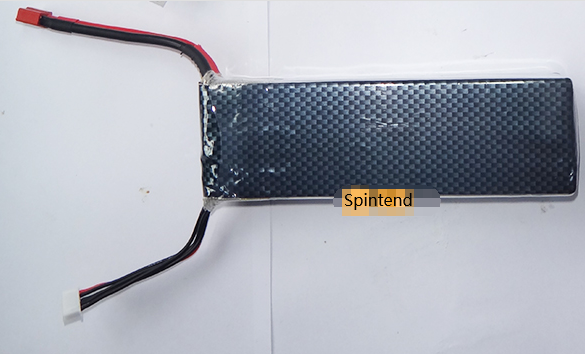
Finished good
Lastly, here is the DIY cost of all used materials, total 28.4 USD. it's far more cost saving.
|
Material |
Q'ty |
Unit price($) |
Sum price(($)) |
|
cells |
4 |
5.5 |
22 |
|
balance cable |
1 |
0.9 |
0.9 |
|
T-head plug |
1 |
1.5 |
1.5 |
|
cell welding plate |
1 |
0.9 |
0.9 |
|
high temp tape |
1 roll |
1.5 |
1.5 |
|
glass fiber tape |
1 roll |
1.6 | 1.6 |
Leave a comment